How to change group head solenoid valve of espresso coffee machine
Changing the group head solenoid valve of an espresso machine requires some technical skill, but you can do it with the right tools and steps. Here’s a step-by-step guide:
Tools Needed:
✔ Screwdrivers (Flat & Phillips)
✔ Adjustable wrench or spanner
✔ Allen key set
✔ Teflon tape (optional)
✔ New solenoid valve (compatible with your machine)
Steps to Replace the Group Head Solenoid Valve
1. Turn Off and Unplug the Machine
Ensure the machine is completely powered off and unplugged.
Let it cool down to avoid burns.
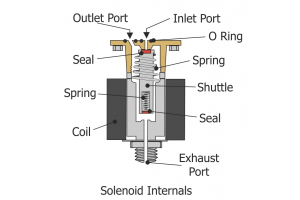
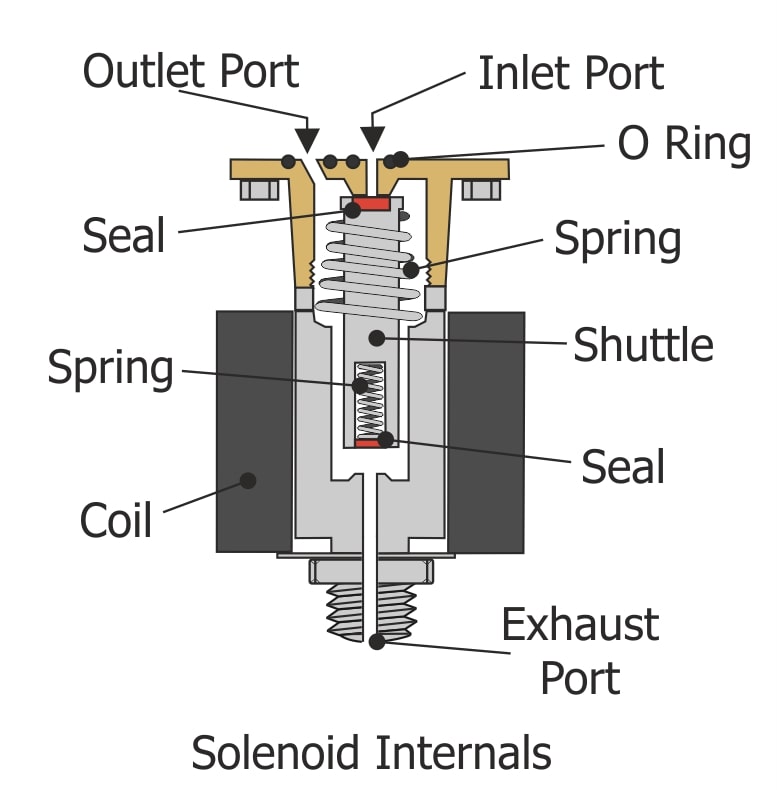
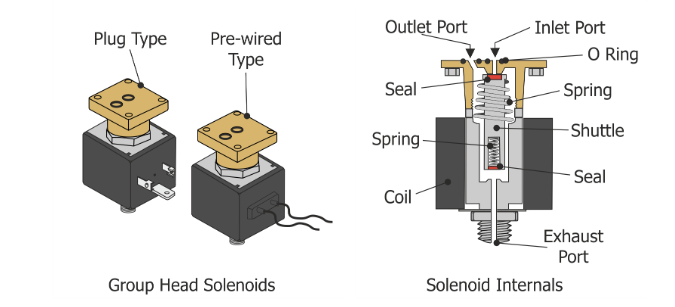
2. Access the Group Head Solenoid Valve
Remove the top cover or side panels (depending on your machine model).
Locate the solenoid valve—usually near the group head and connected to the boiler or water lines.
3. Disconnect the Wires
Identify the electrical connections on the solenoid valve.
Take a picture or label them for reference.
Carefully unplug the wires.
4. Remove the Solenoid Valve
Use a wrench to unscrew the water inlet and outlet connections.
Some solenoid valves are mounted with screws—remove them with a screwdriver or Allen key.
Take out the old solenoid valve.
5. Install the New Solenoid Valve
Position the new solenoid valve in place.
Secure it using screws or bolts.
Reconnect the water lines (apply Teflon tape if needed to prevent leaks).
6. Reconnect the Wires
Attach the electrical wires according to your earlier reference.
7. Test the Machine
Reassemble the panels and turn on the machine.
Run a test by pulling a shot to check if water flows properly.
Troubleshooting:
❌ If no water flows → Check electrical connections.
❌ If there’s a leak → Tighten fittings and apply Teflon tape.
❌ If the machine still doesn’t work → The problem may be with the control board.